
Are you looking for a way to capture your favorite songs, playlists, or even entire albums from Apple Music?
Screen recording is an excellent solution that can help you achieve this.
With screen recording, you can capture the audio and video output of the Apple Music app while it’s playing your favorite tracks.
In this article, we will show you how to screen record Apple Music on your iPhone or iPad.
What Do You Need to Screen Record Apple Music?
Before you start recording Apple Music on your iPhone, you need to make sure that you have met some prerequisites.
Device Requirements
- To record Apple Music on your iPhone, you need to have an iPhone running iOS 11 or later.
- If you have an iPad or iPod touch, you can also record the screen with the same method, but the steps might be slightly different.
- Make sure that your iPhone has enough storage space to save the recorded video.
- Screen recording can take up a lot of space, so it’s better to have at least 1GB of free space on your device.
Software Requirements
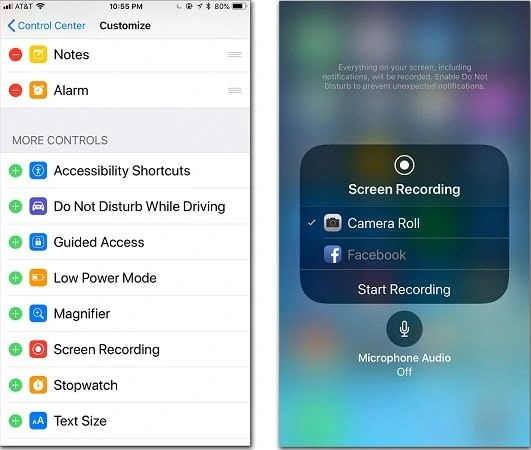
To record the screen on your iPhone, you need to add the Screen Recording feature to your Control Center. Here’s how to do it:
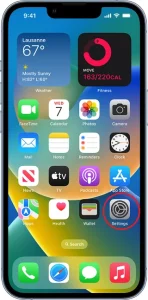
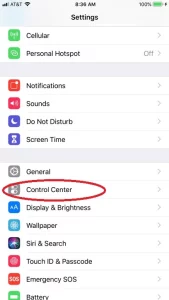
- Go to Settings on your iPhone.
- Tap Control Center.
- Tap Customize Controls.
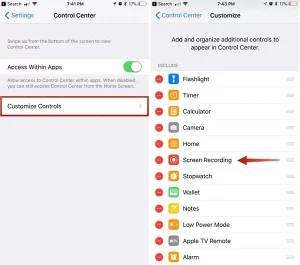
- Scroll down and find Screen Recording.
- Tap the green plus sign next to Screen Recording to add it to your Control Center.
Once you have added Screen Recording to your Control Center, you can access it by swiping up from the bottom of your screen to open Control Center and tapping the Screen Recording icon.
Make sure that you have the latest version of Apple Music installed on your iPhone. You can update your apps by going to the Apple App Store and tapping Updates.
How to Screen Record Apple Music? Steps
Here are the steps to record Apple Music using screen recording on your device.
Starting a Recording
- Go to your device’s settings and enable screen recording. The process for this may vary depending on your device and operating system, but typically you can find this option under Control Center or Quick Settings.
- Open the Apple Music app and select the song or playlist you want to record.
- Activate the screen recording feature by swiping up from the bottom of your screen (or from the top-right corner on some devices) to access the Control Center.
- Tap on the screen recording icon to start the recording.
- Once the recording has started, play the song or playlist you want to capture.
- Make sure the audio is playing through your device’s speakers or headphones, so it will be recorded along with the video.
- When you’re finished recording, stop the screen recording by tapping on the screen recording icon in the Control Center again.
Read Also: How to Transfer Apple Cash to Bank Account?
Common Issues of Screen Recording
If you encounter issues while screen recording Apple Music, don’t worry.
Here are some common issues and how to troubleshoot them.
Audio Sync Issues
If you notice that the audio is out of sync with the video, try the following:
- Pause the music for a few seconds before starting the screen recording. This will give your iPhone time to buffer the audio and sync it with the video.
- Restart your iPhone and try recording again.
- Check if there is enough storage space on your iPhone. If your iPhone is running out of space, it may cause audio sync issues.
Read Also: Download iPhone 14 Pro Max Wallpapers [HD 4K 3D]
Quality Issues
If you notice that the quality of the screen recording is poor, try the following:
- Make sure that your iPhone is running the latest version of iOS.
- Check if there is enough storage space on your iPhone. If your iPhone is running out of space, it may affect the quality of the screen recording.
- Adjust the screen recording settings to improve the quality. Go to Settings > Control Center > Customize Controls > Screen Recording > Microphone Audio. Make sure that the microphone is turned on and set to Automatic.
- Make sure that you are recording in a well-lit environment. If the lighting is poor, it may affect the quality of the screen recording.
Understanding Apple Music’s Policies
When it comes to screen recording Apple Music, it is important to understand the policies and limitations set by the platform.
In this section, we will discuss the copyright restrictions and screen recording limitations imposed by Apple Music.
Copyright Restrictions
Apple Music has strict copyright restrictions in place to protect the rights of artists and record labels.
As per their terms and conditions, users are not allowed to record, copy, or distribute any content from the platform without explicit permission from the copyright owner.
Read Also: Nware 17in Laptop: Everything You Need to Know
Screen Recording Limitations
While Apple Music does not explicitly prohibit screen recording, there are certain limitations to screen recording on the platform.
For instance, screen recording is not allowed for music videos on Apple Music due to licensing agreements with record labels.
Screen recording may not work for certain songs or albums on Apple Music due to DRM (Digital Rights Management) protection. DRM is a technology used to prevent unauthorized copying and distribution of digital content.
Furthermore, screen recording may not capture the highest quality audio due to compression and other technical limitations.
Therefore, it is recommended to use a high-quality screen recording tool to ensure the best possible audio quality.
Conclusion
Screen recording Apple Music is a convenient way to save your favorite songs and albums for offline playback.
With the built-in screen recording feature on most devices, you can easily capture everything that is happening on your screen, including audio.
With the methods and tips outlined in this article, you can easily capture and enjoy your music collection on the go.